Best Finger Placement for Typing: Complete Touch Typing Guide for Beginners
Introduction
If you want to type faster with fewer mistakes, the most important skill you must learn is correct finger placement. Many beginners type slowly because they use only a few fingers or place their hands incorrectly on the keyboard.
Learning the best finger placement for typing helps you build speed, improve accuracy, and develop strong muscle memory. It is the foundation of touch typing and is essential for beginners who want to type professionally.
In this guide, you will learn:
- Correct finger positions on the keyboard
- Home row technique
- Finger mapping for all keys
- Daily practice tips to improve typing
What Is Finger Placement in Typing?
Finger placement means assigning each finger to specific keys on the keyboard.
Focus keyword: touch typing for beginners
Instead of randomly pressing keys, each finger has its own area to control. This makes typing:
- Faster
- More accurate
- More comfortable
What Is the Home Row Position?
The home row is the base position where your fingers rest while typing.
Home Row Keys
- Left hand → A, S, D, F
- Right hand → J, K, L, ;
- Thumbs → Spacebar
Why Home Row Is Important
- Builds typing foundation
- Improves muscle memory
- Helps you type without looking at the keyboard
Focus keyword: typing practice for beginners
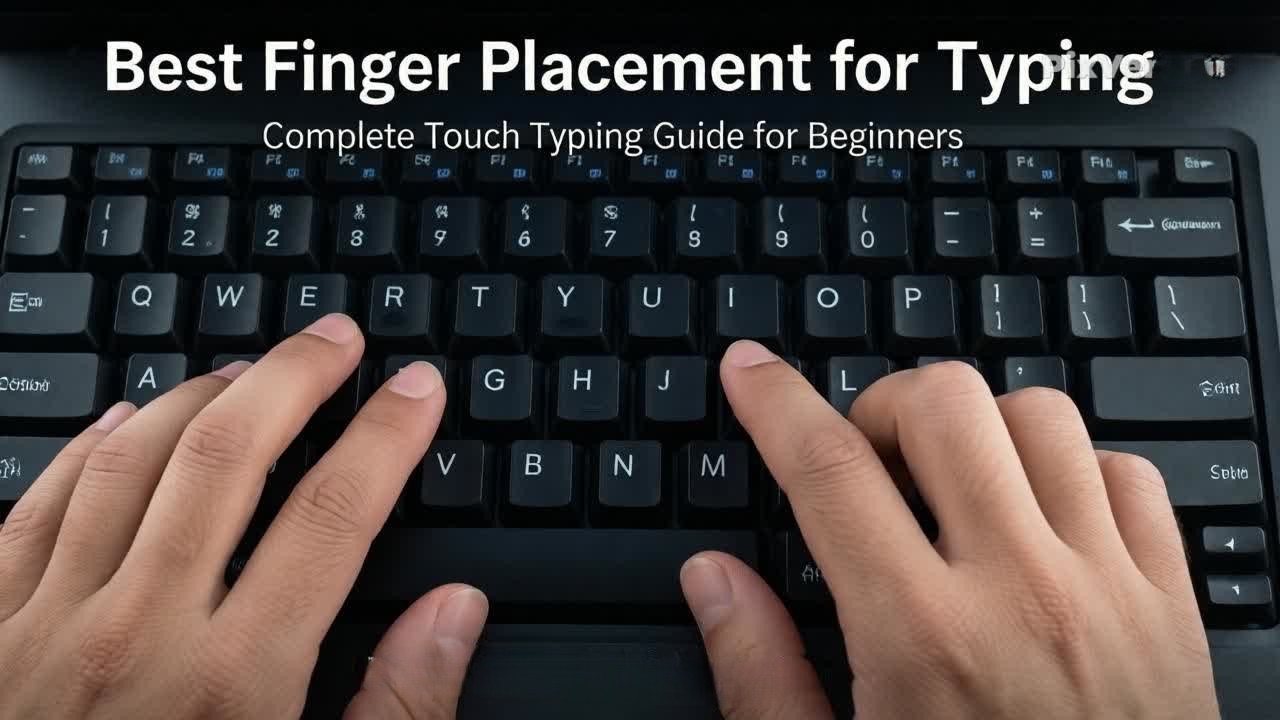
Best Finger Placement for Each Key
Left Hand Fingers
Pinky Finger
- A, Q, Z, Shift
Ring Finger
- S, W, X
Middle Finger
- D, E, C
Index Finger
- F, R, T, G, V, B
Right Hand Fingers
Index Finger
- J, U, Y, H, N, M
Middle Finger
- K, I
Ring Finger
- L, O
Pinky Finger
- ;, P, Shift, Enter, Backspace
Thumbs
- Spacebar (both thumbs can be used)
Why Proper Finger Placement Matters
Focus keyword: how to increase WPM fast
Correct finger placement helps you:
- Type faster with less effort
- Reduce typing mistakes
- Build strong muscle memory
- Avoid hand strain
- Improve long-term typing speed
Step-by-Step Guide to Learn Finger Placement
Step 1 – Learn Home Row First
Start by practicing:
- ASDF
- JKL;
Step 2 – Practice Slowly
Do not rush. Focus on the correct fingers.
Step 3 – Avoid Looking at the Keyboard
Train your brain to remember key positions.
Step 4 – Practice Words
Start typing simple words like:
- cat
- dog
- home
- keyboard
Focus keyword: daily typing practice routine
Step 5 – Practice Sentences
Move to full sentences:
- I am learning typing
- I practice every day
Common Finger Placement Mistakes
Using Only Two Fingers
This slows typing speed and reduces accuracy.
Wrong Finger Assignment
Using the wrong finger creates confusion and mistakes.
Looking at the keyboard
Prevents muscle memory development.
Ignoring Home Row
Skipping basics slows long-term progress.
Typing Too Fast
Speed without correct placement leads to errors.
Tips to Improve Finger Placement Faster
- Practice every day
- Start slow and focus on accuracy
- Use all fingers equally
- Follow the home row position strictly
- Take short breaks during practice
- Stay consistent
Focus keyword: improve typing accuracy at home
Daily Practice Routine for Finger Placement
20–30 Minutes Daily Plan
5 Minutes
Home row practice (ASDF JKL;)
5 Minutes
Finger exercises and key mapping
10 Minutes
Word typing practice
5–10 Minutes
Sentence typing or typing test
You can track your improvement using Typing Master Pro to practice finger placement, accuracy, and WPM progress.
Conclusion
Learning the best finger placement for typing is the foundation of fast and accurate typing. Once you understand which fingers control which keys, your typing becomes smoother, faster, and more natural.
Focus on:
- Home row practice
- Daily typing exercises
- Accuracy before speed
- Consistent learning
With regular practice, your fingers will automatically remember key positions, helping you type without thinking.